Blogs / Home Tips

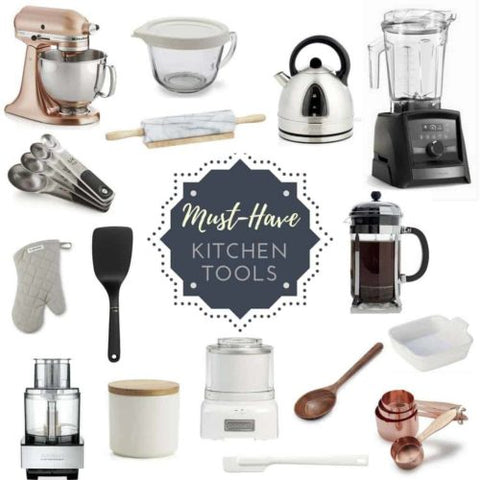
18 Must Have Kitchen Tools

18 Must Have Kitchen Tools

Cooking is easier and faster with the right equipment. Stock your kitchen with these basics.

 This list is definitely not all-inclusive, but it’s not bare bones either
it’s somewhere in between. Hopefully it will be useful and possibly even introduce you to something new.

Pots & Pans.

You don’t need a cupboard full of pots and pans to get by very handily in the kitchen. I think most of us tend to have too many overall. All you REALLY need is:

  • a small sautĂ© pan and a large sautĂ© pan
  • a small sauce pan and a larger sauce pan
  • a pot for cooking pasta, stock, etc.
Knives.

You don’t need a big block of knives. You need a chef knife, a paring knife, and a bread (serrated) knife — these will handle most everything you’ll need to cut. Invest in as good a quality of knives as you can afford, but I wouldn’t go crazy.

Cutting Board.

A large cutting board, a 15″ x 20″ is good. Nothing is worse than watching your chopped-up veggies fall to the floor because you don’t have enough work space. Don’t forget a smaller plastic cutting board for handling meat and poultry safely.

Whisk.

Some people prefer the one with thin wires rather than thick heavy ones or prefer a solid handle so food doesn’t get stick in it. Most important, make sure it fits well in YOUR hand.

Wooden Spoons.

They are inexpensive and come in very handy, especially when cooking with non-stick pans because they won’t scratch.

Grater.

Microplane graters are all the rage, but I’ll stick with my sturdy box grater. It’s versatile with four different grate options to shred, shave, dust, and zest.

Kitchen Shears.

These scissors designed for the kitchen make help with cutting herbs, garnishes and pie crusts just to list a few.

Lemon Squeezer.

A fairly recent acquisition to my kitchen, but once I experienced the joy of fresh squeezed lemon juice in my salsa and other lemony dishes, I was sold! SO much easier than trying to squeeze with just your hands.

Potato Masher.

Perfect to “whip” up homemade mashed potatoes although some prefer them a little more “rustic” with lumps and all, so a potato masher is a must-have for that. A masher with a curved head allows you to get into corners of bowls and pots.

Instant-read thermometer.

They are pricey but you will never ruin an expensive steak on the grill again!

Nesting Bowls.

There is nothing more frustrating than trying to cook without the right size bowls. Nesting bowls give you a range of sizes, and don’t take up too much valuable storage space.

Measuring cups.

A MUST for baking. You should have at least one Pyrex liquid measuring cup You’ll also need a set of measuring cups for solids.

Measuring Spoons.

Oval measuring spoons fit into spice jars better than round ones.

Peppermill.

FRESHLY ground pepper. Why not? You can also easily adjust it from a coarse grind to a fine one. I like that.

Blender.

A good all-purpose blender of ANY kind is a definite must-have in any kitchen. It can puree, whip, and chop at a fraction of the cost of a food processor.

Slow Cooker.

Slow cookers are cheap to buy, economical to use and they’re great for making the most of budget ingredients. Not to mention the convenience of throwing in all the ingredients and then walking away. What’s not to love?

Stand Mixer.

You can mix BIG batches with ease. Basically it just makes mixing anything a lot easier.

Cast Iron Enamel Dutch Oven.

Enameled cast iron is heavy, heats evenly and stays hot. Its surface allows browning but is virtually non-stick. It can be used on top of or in the oven. And they are so pretty.

It’s ideal for simmering, marinating, poaching, braising, and browning. It even goes from the stove or oven to the table and can store leftovers in the refrigerator or freezer!


From – A wife who cooks for her husband and children for over 25 years now.

Eddie Pile
Read more
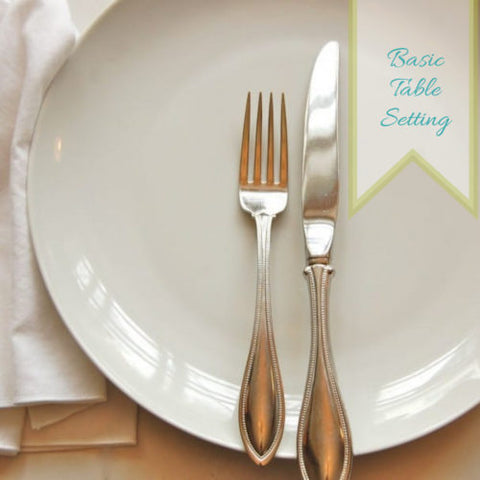
Make Your Next Meal Extra Special Part 1 (How To – Basic Table Setting)

Make Your Next Meal Extra Special Part 1 (How To – Basic Table Setting)

If you’re getting things ready for an everyday dinner or a weekend breakfast, you might want to know how to set a table properly. For casual events, one needs just a basic table setting: a placemat, cutlery (fork, knife, and spoon), a dinner plate, a water glass, and a napkin.

Basic Table Setting Instructions

  1. Lay the placemat on the table.
  2. Put the dinner plate in the middle of the placemat.
  3. Lay the napkin to the left of the plate.
  4. Place the fork on the napkin.
  5. To the right of the plate, place the knife closest to the plate, blade pointing in. Place the spoon to the right of the knife. (Note: The bottoms of the utensils and the plate should all be level.)
  6. Place the water glass slightly above the plate, in between the plate and the utensils, about where 1 p.m. would be on a clock face.

Basic Table Setting Etiquette Tips

If you prefer, it is acceptable to set the napkin on top of the plate in a basic table setting, though some think this can create a more formal feeling.

Now that you know the basic table setting rules, brush up on your table etiquette.

Eddie Pile
Read more
How effective are Citronella Candles?

How effective are Citronella Candles?

Citronella oil is one of the many oils that blends well with most waxes, and can be used to make effective candles for repelling mosquitoes, alongside providing a number of beneficial effects to the skin and respiratory system. Citronella oil has a characteristic soothing smell that is both sharp as well as has a healing aspect to it. Citronella oil candles emit strong antiseptic, antimicrobial and antifungal substances to the environment which help drive away insects effectively. Citronella oil candles are often used as garden candles in seasons when mosquitoes create quite a havoc to families looking for a relaxing day out from a busy schedule. The method in which Citronella oil works is by disorienting the insects’ ability to detect and get attracted to the scent that helps it find and attack its victim. Candles made from Citronella oil are a safe and effective option to enable a small quantity of scent to be inhaled by the body and help your body, mind and soul process the natural ingredients contained in it slowly and effectively. 

Citronella oil is very easily dissipated in the environment and the right amount of Citronella oil is contributed to the environment by way of burning candles made from Citronella oil. Citronella oil candles, when burned, provide relief from mosquitoes for a number of hours, according to popular research studies. In this way, a number of diseases carried and transferred through the lethal blood of carrier mosquitoes can be avoided effectively. These diseases include dengue fever, chikungunya and yellow fever. The hour protection from mosquitoes and a number of insects are quite in line with the amount and duration of the mosquito repellant effect from DEET-based chemical agents. Hence, it is competitive in every sense to all the mosquito repellent products available in the market. 

The warming and activating effects of Citronella oil derived from the plant parts of Ceylon Citronella or Java type Citronella and Candles which are blended to release the essential oils of Citronella override all effects that might be manifested on the human body due to the strength of Citronella when ingested or inhaled directly. These include depression of the nervous system, irritation of the eye and the skin and plant and animal toxicity and possible risk of flammability, especially in dry environments. Encapsulating the right quantity of Citronella oil in candles is the best way to resolve the damaging effects of an overdose of Citronella. 

Eddie Pile
Read more
Cooking Methods Using Oil #1 - Sautéing

Cooking Methods Using Oil #1 - Sautéing

SautĂ©ing, defined. To sautĂ© is to cook food quickly in a minimal amount of fat over relatively high heat. The word comes from the French verb sauter, which means "to jump," and describes not only how food reacts when placed in a hot pan but also the method of tossing the food in the pan. The term also refers to cooking tender cuts of meat (such as chicken breasts, scaloppine, or filet mignon) in a small amount of fat over moderately high heat without frequent stirring―just flipping it over when one side is browned. 

What sautéing does. The browning achieved by sautéing lends richness to meats and produce. And because the food is cooked quickly, the integrity of the flavor and texture remains intact; asparagus, for example, retains its slightly grassy punch, as well as a pleasing crisp-tender bite. 

Equipment. Use either a skillet (a wide pan with sloped sides) or sauté pan (a wide pan with straight sides) for this technique. Both have a large surface area, so food is less likely to become overcrowded. Choose a pan with a dense bottom that evenly distributes heat. Nonstick, anodized aluminum, and stainless steel options work well. 

Best foods to sautĂ©. Whether it's meat or vegetables, time in the pan is brief, so it's important that the food be naturally tender. Cuts such as beef tenderloin, fish fillets, and chicken breasts are good candidates; tougher cuts like brisket or pork shoulder are better for long cooking over low heat. The same principle holds for produce. Asparagus tips will be more successfully sautĂ©ed than beets. Many other tender vegetables, including baby artichokes, sugar snap peas, mushrooms, and bell peppers, lend themselves to this technique. That's not to say that denser, tougher vegetables can't be sautĂ©ed―they just may need to be blanched (briefly cooked in boiling water) first to get a head start on cooking. 

Size matters. Cutting food to a uniform thickness and size ensures that it will cook evenly. Vegetables should be no larger than bite-sized, meat no larger than portion-sized. Meat that is too thick or vegetables that are too large run the risk of burning or forming a tough, overly browned outer crust in the time that it takes to completely cook them. Have the ingredients prepped before heating the pan. 

Heat the pan. Be sure to warm the pan over medium-high heat for a few minutes. It needs to be quite hot in order to cook the food properly. If the heat is too low, the food will end up releasing liquid and steaming rather than sautéing. 

Add fat. Fats such as butter, oil, or bacon fat are used to coat the food and prevent it from sticking to the pan, aid in browning, and add flavor. Once the pan is hot, add the fat, and swirl to coat the bottom of the pan. (Heating the fat with the pan may cause food to stick.) Heat the fat for 10 to 30 seconds―until oil shimmers or butter's foam subsides―and then add the food. 

Don't overcrowd. It's crucial that only one layer of food cooks in the pan at a time. When sautéing cuts of meat, there should be at least a half-inch between each piece. Food releases steam when cooking. If that steam doesn't have enough room to escape, it stays in the pan, and the food ends up steaming rather than sautéing and won't brown. If you've ever tried to sauté a large amount of cubed beef for a stew, you may have experienced this problem. The solution is simply to sauté the food in smaller batches. 

Toss and turn. When sautéing tender vegetables and bite-sized pieces of meat, stir frequently (but not constantly) to promote even browning and cooking. Dense vegetables such as cubed potatoes, though, should be stirred once every few minutes so that they don't fall apart as they grow tender. Portion-sized cuts of meat (chicken breasts, steaks, or pork medallions, for example) should only be turned once so they have enough time to form a nice crust, which will also keep the meat from sticking to the pan. 

Stir-fry vs. sauté. Stir-frying and sautéing are techniques that share some similarities. Both methods cook food quickly in a small amount of fat. But stir-frying cooks food over intensely high heat, stirring constantly. Sautéing involves only moderately high heat, and the food is not in continuous motion. 

Source – Cooking Light 

Eddie Pile
Read more
6 Tips for Keeping Your Kitchen Clean

6 Tips for Keeping Your Kitchen Clean

Start with a clean kitchen

If at all possible, don’t start cooking until your kitchen is relatively clean. If you start cooking and your kitchen is already a disaster, you’ll just get depressed and throw up your hands in despair after cooking a meal.

If you start with a clean slate, you’ll be more motivated to keep it clean.

Clean while you wait

If you find yourself with some free time in the kitchen, use it wisely! For example, if you’re waiting for a pot of water to come to a boil, instead of standing around, do a bit of cleaning. Start unloading the dishwasher. Put away cooking utensils that you’re done using. Wipe down the counters. You’ll be amazed at how much you can get done during the in-between times of cooking.

Clean up spills ASAP

This is another one that we all know we should do, but neglect when we are in a hurry. The reality is, if you get to a spill as soon as possible, it will be so much easier to clean up. Dried-on gunk has to be soaked or scraped first, when it could have been cleaned up with a simple wipe.

Have a compost/trash bowl

Instead of throwing your food scraps onto the counter, it’s much more efficient to place them in a dedicated compost bowl. This way you don’t have to wipe up the food juice, and you can quickly dump the scraps all at once. You can even peel carrots, potatoes, cucumbers, etc. directly into the bowl to save time.

A place for everything

Have a place for everything

Instead of having things scattered here and there about your kitchen, it’s much better to have similar things all in one spot. For example, I have a large plate on which I keep all of my non-refrigerated fruit. I also like to keep all of my cooking utensils on one end of my kitchen. That gives me a long expanse of counter with nothing on it. Glorious!

Have set days and times for doing things

I have found that forgetfulness is one of my main reasons for not getting certain chores done. When you have set days for doing certain things, it’s much easier to actually remember to do them!

For example, my stove used to get so grimy because I never remembered to wipe it down. Now that I have a set day for doing it, it’s much more likely to get done. I don’t always get to it on exactly the right day, but just knowing that it needs to be done once a week really helps.

You can also have certain times of the day for specific chores. For example, I like to unload the dishwasher after breakfast. That way, it’s ready to be filled throughout the day. And I like to wash dishes right after supper whenever possible. Then I can wake up to a clean kitchen!

So there you have it: tips for keeping your kitchen clean. I hope these inspired you to make the effort to keep your kitchen neat and tidy.

If you have any tips of your own, make sure to leave them in the comments!

Source – The Pioneer Woman

Eddie Pile
Read more
Dish Washing: How to Make It Fun

Dish Washing: How to Make It Fun

Choose fragrant suds 

Think of washing the dishes as a form of aromatherapy. Select a favorite fragrance, like cucumber or lemon, and let your mind wander as you submerge your hands in the warm, soapy water and inhale the enticing aroma. 

Clean as you go 

This likely isn’t new advice, but it’s worth considering. If you clean cups, dishes and utensils immediately after use, you won’t have to contend with an overwhelming heap of dirty dishes. And washing fewer dishes at a time totally makes the task more manageable. 

Wash in spurts 

Not a fan of the “clean as you go” method? Not a problem. Instead, set aside a few time slots each day to scrub some dirty dishes. Grab a soapy sponge and wash as many items as you can until the lather runs out, leaving the rest for later. Breaking up household chores, like dishwashing, can make them seem less daunting! 

Divide and conquer 

Believe it or not, doing the dishes can double as bonding time with your significant other, children or roommates. You wash while they dry (or vice versa) and take advantage of your togetherness by catching up on the day’s events while crossing this necessary task off your to-do list. 

Stick to a system 

To alleviate some of the stress—and set yourself up for success—devise a dishwashing system. For instance, invest in a dish rack instead of stacking clean dishes precariously on your countertop, and make it a point to always put away clean dishes before you start cooking so you’ll have sufficient space to tend to the newly soiled ones.   

Create a playlist 

Make a compilation of your all-time favorite tunes and only allow yourself to listen to them while you’re washing dishes. Pretty soon you’ll actually find yourself looking forward to scraping caked-on residue off your dinner plates! 

Listen to a podcast 

Taking in a podcast while tackling your dirty dishes can take your mind off the chore at hand. Choose a topic that interests you, and before you know it, you’ll be eyeballing a collection of clean plates, cups and silverware. 

Race to the finish 

Set a timer for five (5) to ten (10) minutes and see how many dishes you can wash in your chosen timeframe. Next time, try to break your record. Or, split your dirty dishes in half and challenge a significant other, child or roommate to see who finishes first. Who knew that cleaning could be so much fun?! 

Challenge yourself 

And speaking of fun, create other enjoyable challenges like using only your non-dominant hand to scrub pots and pans or having a partner instruct you as you wash the dishes while blindfolded. Don’t be afraid to get creative! 

Unwind while washing 

Try to clear your mind while you’re washing the dishes. Because this chore is simple and requires very little brainpower, it will allow you an opportunity to meditate, relax and escape from everyday concerns.   

Reward yourself 

Silly as it may seem, set a dishwashing goal and determine an appropriate reward for achieving it. For example, if you wash dishes for two weeks without hesitation or complaint, buy yourself a bouquet of flowers. At the two-month mark, reward yourself with a massage. Associating the task (and its achievement) with a prize can automatically increase its fun factor!   

Source – Vitacost 

Eddie Pile
Read more
Benefits of Buying Bulk Foods

Benefits of Buying Bulk Foods

Buying in bulk can be your best bet for getting the best deals, trying new foods, and creating less waste.  

Purchasing your food in bulk has many great benefits for both you and the environment. Take a look at these reasons below and try shopping in bulk as much as you can, we think you will enjoy it too! 

1. Reduce Waste.

By shopping at bulk food stores you will reduce both your packaging waste and also your food waste. Buying in bulk eliminates the need for fancy packaging & single-use plastic. 

2. Reduce Transport Miles 

Bulk goods require less overall transportation because there are less packaging components that must be produced and transported prior to being filled. The transportation of bulk products is more efficient because they can be packed more densely on a truck in large sacks and boxes as opposed to individually packaged items. 

3. It’s Cheaper 

Generally speaking, buying in bulk is cheaper. You are not paying for excess packaging so you should find it cheaper than buying similar items at the supermarket. Without the fancy branding that companies charge for, buying in bulk means you are getting nothing but the product- pure and simple! Buying unpackaged foods in the bulk section of the grocery store offers an average savings of 30 to 50 percent versus packaged food. 

4. Waste Less Food
How many of us hate having to throw away foods, whether it’s nuts or spices, which have gone rancid or are past their expiration date
 Buying in bulk allows you to purchase the exact amount of foods you need, as opposed to manufacturer-divvied portions. Whether you need just a pinch or a few cups or even a pound, buying in bulk helps you get exactly what you want. 

5. Make your home bulk friendly
Discard pre-packaged food in boxes, plastic tubs and cans. Purchase glass storage containers, stainless steel jars, or even reuse mason jars to store foods instead - this is a small investment that is definitely worth it.
What to do with your bulk purchases? Make a granola or trail mix. Mix the dried fruit with nuts and seeds and voila, you have your own signature trail mix that is a great healthy snack! 

6. Reduce Material Waste
According to BIG, an average shopping basket of 10 products refilled across the year, saves 118 pieces of packaging from a landfill.  

7. Help the Environment
Eliminating packaging reduces the carbon footprint. Less packaging means that less ends up in the landfill. Bulk food also streamlines the transportation needed for delivery, helping to reduce CO2 emissions. According to BIG, there is an average reduction of emission by 48 percent each time a product is refilled from bulk versus the same product bought in traditional packaging.
 

Source – Supermarket Guru & The Source Bulk Foods

Eddie Pile
Read more
Laundry Tips Readying Clothes for the Washer

Laundry Tips Readying Clothes for the Washer

Readying Clothes for the Washer

Today we have some simple tips to make your washing a #tril?

Remove pins or buckles, zip zippers, close snaps and hooks, and secure Velcro to prevent snags and abrasion. But don't button buttons, which can stress the buttons and buttonholes.

Empty pockets and turn them inside out, unfurl socks, and unroll cuffs. Tie sashes and strings to prevent tangling. Place delicate items like lingerie and fine knitwear in zippered mesh bags. Turn delicate items, sweaters, and cotton T-shirts inside out to prevent pilling. Put socks—oh, those socks—in a pillowcase or mesh bag so they don't get separated.


Eddie Pile
Read more
Do You Know Which Fridge Shelves You Should Store Your Food On?

Do You Know Which Fridge Shelves You Should Store Your Food On?

https://www.today.com/food/how-keep-food-fresh-fridge-storing-it-right-place-t89496

Each of the following compartments  in the fridge (door, upper shelves, bottom shelf, meat drawer and crisper drawer) are designated to specific groceries/food so that freshness can be maximized. To get detailed information watch the video by clicking the link above.

Eddie Pile
Read more

After Washing with Tril, Pack Clothes Away With These Few Tips

I think the least favorite part about doing laundry is packing our clothes away. This video shows us how to pack our clothes away efficiently.

Eddie Pile
Read more
How to Get Rid of Unwanted (Hazardous) Household Items

How to Get Rid of Unwanted (Hazardous) Household Items

Before ‘getting rid’ of any of the following items listed below, you are encouraged to do research within your country. It is important to dispose of household items in a safe and environmentally friendly manner.

Cleaning Supplies

Most household cleaning supplies contain harsh ingredients that shouldn’t just be tossed in the garbage. Check the back of each bottle to see if there are disposal instructions. Many liquid, gel or powder cleaners can be disposed of in the same way that the product is used, such as down the drain. Plastic bottles and aerosol cans can often be recycled when empty. Products with hazardous chemicals like oven cleaners should be taken to a waste disposal location.

Appliances

Fridges, freezers, window Ac units and dehumidifiers may contain toxics such as mercury, so sending to the landfill is not a good idea. If they are in good condition you can resell to a business/individual or donate to a group (school, charity).

Batteries

We’ve all been there – the dead remote, weak flashlights, beeping smoke alarms; we get frustrated and quickly toss the used batteries. While completely depleted alkaline batteries like these don’t usually contain enough hazardous material to do much harm, throwing them away in bulk can have an effect on the surrounding environment.

The more acidic batteries that you need to be wary of are car batteries, lithium and lithium ion batteries, rechargeable batteries, and zinc air batteries. The materials used in these are extremely toxic and should be brought to a proper hazardous waste disposal facility.

Paints

Oil based paints, paint strippers or removers, varnishes, stains, and coatings are highly flammable and use chemicals that are considered hazardous. You can check with the supplier for information on how to dispose. If you are using latex, or water-based paints, you can actually dry these out – away from children and pets – and dispose of them regularly with your normal trash.

Being mindful of what constitute as hazardous materials in your home is the most important step in preventing undue contamination.

Eddie Pile
Read more
General Cooking Tips and Tricks

General Cooking Tips and Tricks

  1. Always measure when baking. Baking is a science and any wrong measurements can be disastrous.
  2. Invest in a baking scale. Scales are not only an accurate way to measure your cooking ingredients, but they streamline the entire process.
  3. Always read and re-read your recipes before you start cooking.
  4. Anchor your cutting board to the counter with a damp paper towel to keep things steady and safe.
  5. Test oil in a pan before adding all of your ingredients. Throw a small piece in and make sure it sizzles before adding the rest.
  6. When sautéing, it is important to first heat the pan, then heat the oil, then add the ingredients.
  7. Never overcrowd your skillet with food. The heat will not distribute evenly.
  8. If you need to grate soft cheeses, freeze the cheese for 30 minutes for a cleaner slice
  9. Know your cooking methods.
  10. Keep your spices away from sources of heat like the stove or lights. Herbs and spices can lose their flavor when exposed to humidity and heat.
  11. To prevent sogginess, do not dress salads for large parties. Serve, then allow guests to add their own dressing.
  12. Homemade meals are good for the heart and soul. Cook often and cook with others.
  13. Remove seeds from chilies to help reduce heat.
  14. Always marinate foods in a glass or ceramic dish. Most marinades contain an acidic ingredient such as lemon juice, vinegar or wine that can react with metal and cause off-flavors in your food.
  15. Bring meats out of the fridge early. And don’t cook wet meat or fish. Try not to put meat on the grill or pan straight from the fridge. Try bringing it to room temperature first. This technique is based on the theory that the outside part will overcook by the time the internal temperature rises.
    It’s good to remember to take the meat out early to give it some time to warm up a bit before cooking. Another useful tip is to blot it with a paper towel first. If the meat has moisture on the surface, it doesn’t brown as well, and might end up being boiled rather than beautifully seared
  16. Clean as you go!
Eddie Pile
Read more
24 results